- Improved UI, with spatial audio, haptics and onscreen feedback
- New interactive setup tutorial
- Game tips
- New graphics options
- Visual & audio improvements throughout
May 6-13, get LitK 1.3 free on the App Store!
Multimedia artist & filmmaker. Online since 1999.
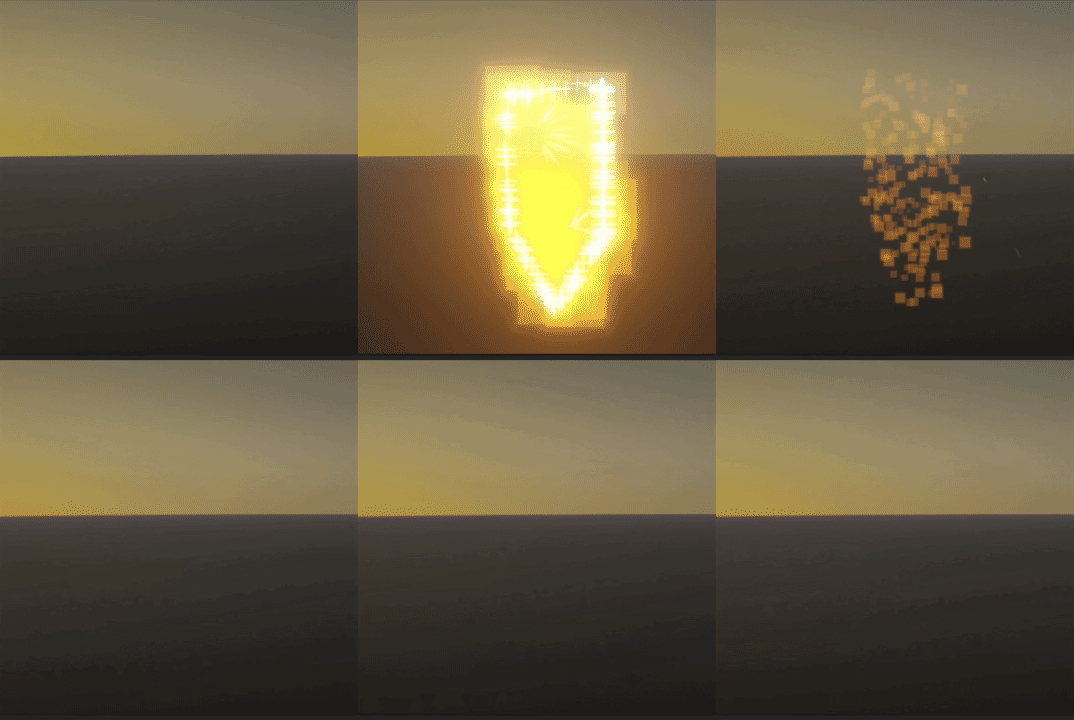
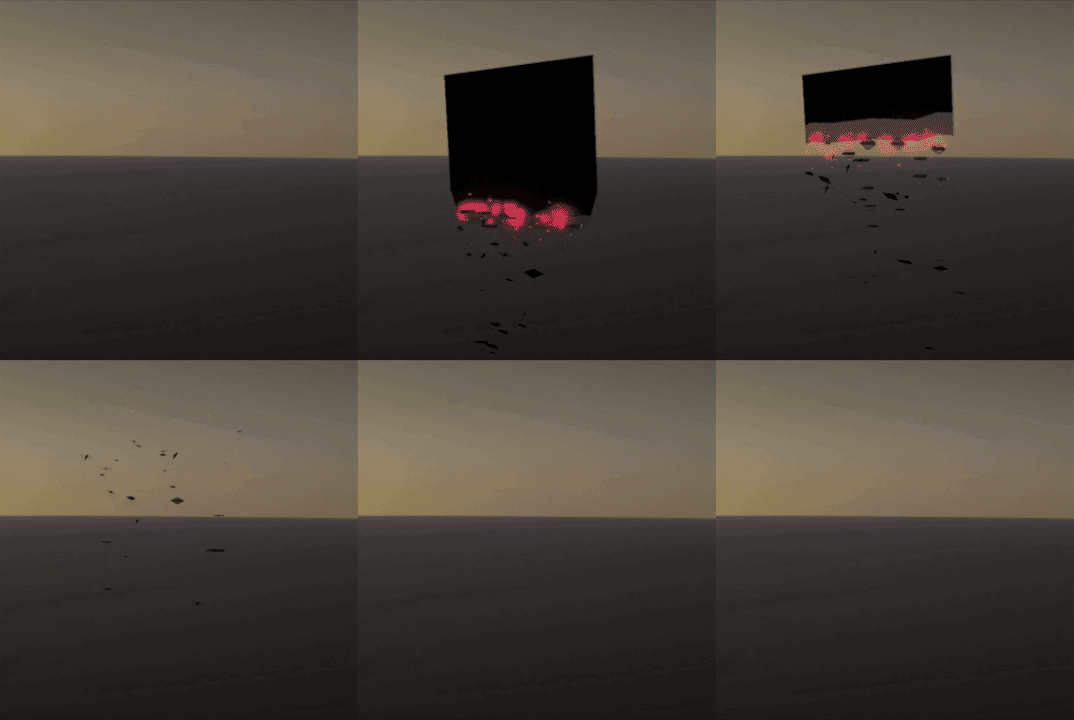
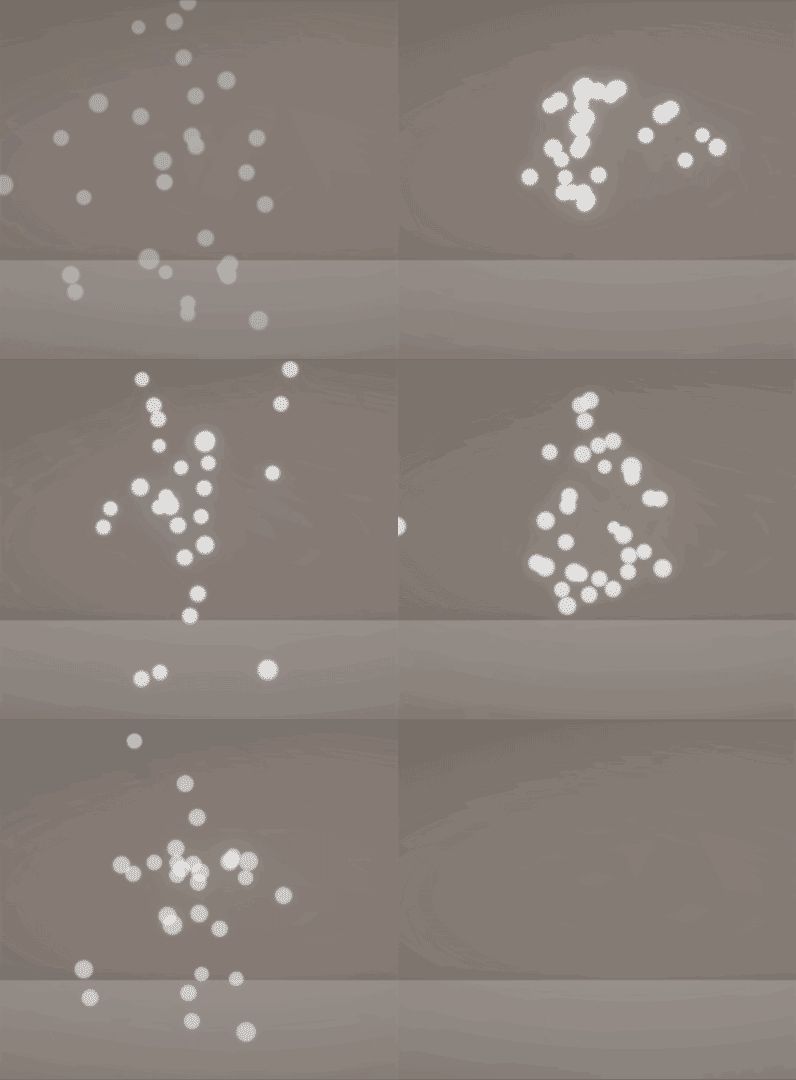
VFX Graph is Unity’s high performance pure-GPU particle effects system. I recently helped Chop Chop Games get a sizzle reel out for an upcoming card battler, which involved a fair amount of prerendered particle work in Apple Motion and Blackmagic Fusion. Looking at their competitors in the space, like Slay the Spire and personal favorite Black Book, got me tinkering again with VFX Graph.
It’s an impressive set of tools, but shader experience is definitely a prerequisite. You need to “think in GPU.” One great decision was making Animation Curves a first-class citizen in VFX Graph, allowing for a lot of nuanced per-channel animation. Getting particle motion properly punchy is always a challenge.
You can download these all in a .unitypackage here. The download also includes a couple of potentially useful subgraphs. Point Force can be positive, to push particles away from a given point, or negative, to suck them in. Orbit can also be positive or negative, to control the direction particles orbit around a center point.
LitK 1.2 is now available on the App Store. It features:
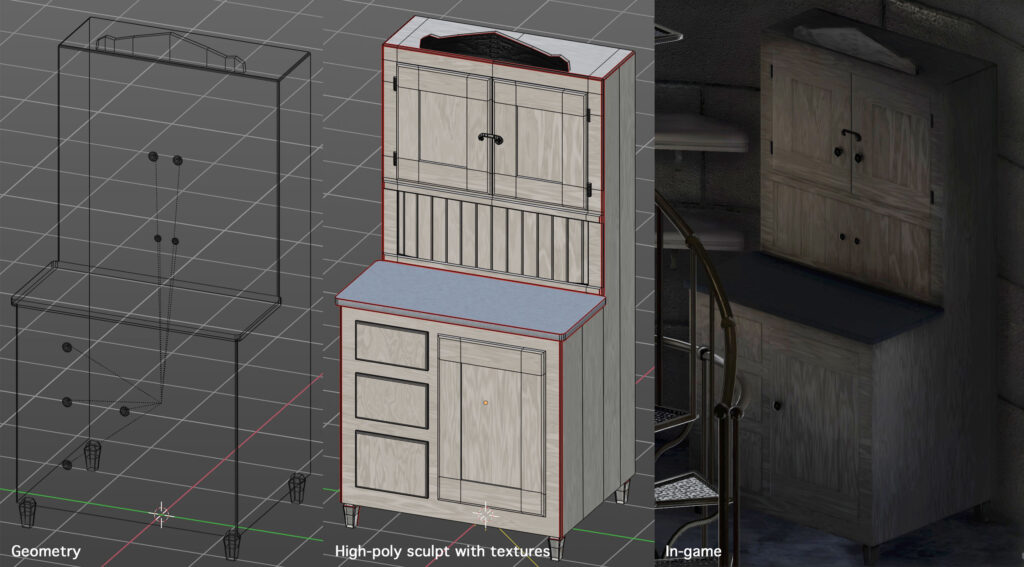
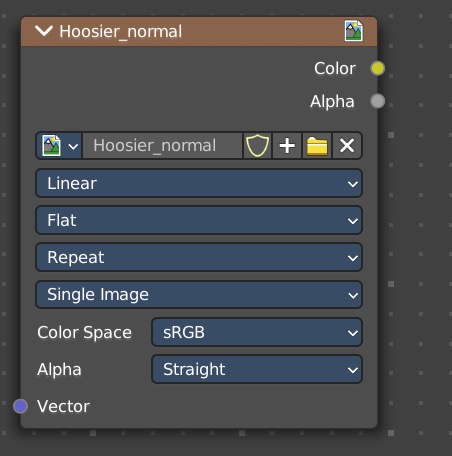
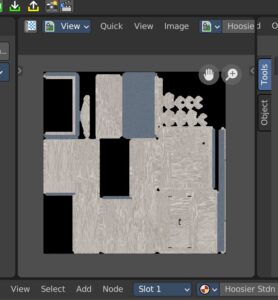
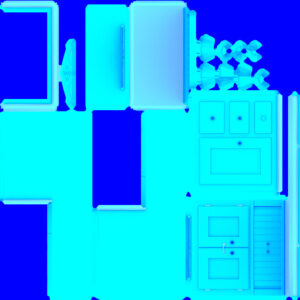
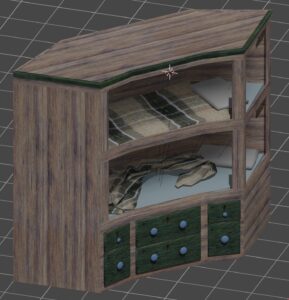
Unlike many tasks, Blender’s powerful but bafflingly-designed texture map baking tools are not improved by its UI-focused fork, Bforartists. Here’s how to use them, with a downloadable example (the Hoosier Cabinet from Lillie is the Keeper‘s upcoming 1.2 release). Click here to download the cabinet model with textures.
Honestly, if I haven’t done it for a while, I can’t remember how the process works, so this will be as much a cheat sheet for me as you.
Since it’s not our focus, we’ll skip quickly through the high-to-low-poly sculpt method. You create a low-polygon model, unwrap its UVs, and make a duplicate (using Duplicate Objects, not Duplicate Linked) in the same world position. Hiding the original, you sculpt a high-detail version, to be baked onto the original as (at minimum) a Normal Map. You can also use Bforartist’s Shading tab to create texture, displacement and color, even applying multiple materials to your high-resolution mesh. Since the UVs don’t have to match between the high and low-poly versions, effects like differently-oriented wood grain are just a matter of mucking with the high-poly sculpt’s UVs.
I’m also largely assuming you’re familiar with importing textures into Unity.
Ambient Occlusion darkens cracks and crannies in your surface. Most importantly, it keeps the inner edges of your Normal Maps from reflecting a bunch of weird phantom light.
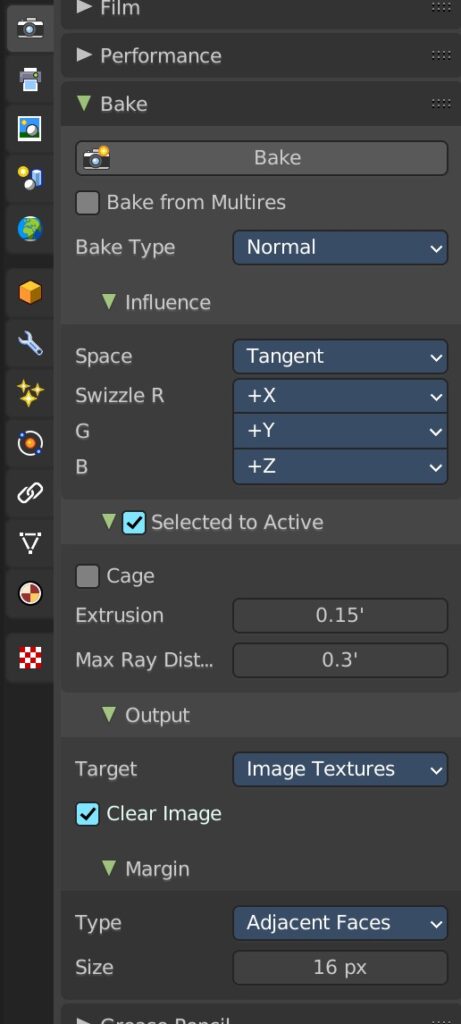
It’s possible to bake Ambient Occlusion (as well as Diffuse and others) from a single model to itself–no high-poly needed. To do this, simply select the model, go to the Bake options and uncheck Selected to Active.
If you’re comfortable with the node-based shader system, and applying multiple materials to a mesh, you can do a lot of interesting texturing in Bforartists.
Typically, you’ll be baking Diffuse maps with a single model, rather than high-poly-to-low. Again, simply select the model, go to the Bake options and uncheck Selected to Active.
This one’s on Unity. In the Universal Render Pipeline (URP), there’s an awkwardly not-quite documented way to pack three monochromatic textures into one, saving two texture taps per draw (and textures in memory). The four channel (RGBA) texture packs a Metallic Map, Occlusion Map, an unused channel, and a Smoothness Map into one, I guess, “MOxS Map.”
With the first of the planned updates out, I’ve improved some of the visual elements that were just sort of roughed in for the initial release. (Because if you wait until everything’s perfect, you’ll never ship.) I wanted to share a little of my process.
Here is the ZIP file. Everything is modelled in Bforartists, the UI-focused fork of Blender, and the file is 100% compatible with the mainline app. I use proxy Materials in Bforartists, as they’re easily replaced with native URP Materials in the .fbx file import dialogue. I find it more reliable to place unused/support items into a separate Scene Collection, and export the Active Collection from the .fbx export dialogue, rather than selecting items manually. Normally I do the bevelling by hand, but on the bunks I tried out the Bevel Modifier, followed by a light Decimate Modifier, to clean up unnecessary flat geometry. It works okay, and it’s quick, but the polygon count ends up higher than necessary. Because of the way Unity handles animations, the curtains are separate files.
The bunks are based loosely on photo references from the New Brighton Lighthouse. They’re meant to feel friendly and cozy, as they’re Lillie’s first sanctuary after the disastrous boat trip. In my head cannon (which I guess makes it the official cannon) we’re playing through Lillie’s memories, fears and anxieties. In “real life” she succeeded at all of these tasks the first time, but–like many of us–obsesses over what could have gone wrong. (Which are our in-game failures and resets.)
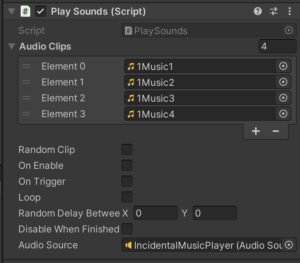
In this ZIP file you’ll find three C# scripts for Unity: PlaySounds.cs, PlaySoundsMultitrack.cs and PlaySoundsBySpeed.cs. The latter two are subclasses of PlaySounds.cs, and require the former in your project. These small, lightweight scripts are used throughout Lillie is the Keeper (along with a couple other subclasses that are dependent on features of the game).
Basically, they do everything that I wish Unity’s own AudioSource Component did by itself. Play through a list of AudioClips? No problem. Play a random clip from a list? Done. Play OnTriggerEnter()? One click. You can play a single clip or all clips, disable the GameObject after playing, trigger audio from an external script, and monitor playing status with UnityEvents or a simple bool.
Check the scripts’ headers for a full rundown of features and how to use them. You’ll also see helpful tooltips in the Unity Editor.
The two subclassed scripts, PlaySoundsMultitrack and PlaySoundsBySpeed let you do two additional things. With the former, you can swap between up to four wholly different sets of AudioClips. Think of a windmill randomly playing different sounds from a playlist at different speeds: a slow, creaky set of sound clips at lower speeds, and a higher, whooshier set at high speed. PlaySoundsBySpeed lets you specify a minimum velocity at which to trigger sounds, and scales the volume up from 0 to 100% at a maximum speed. (Setting both speeds equal always plays the sound at normal volume.)
There are a couple things you may want to customize. These are written for rapid prototyping, trying things out, and generally seeing what works. Just about everything that can be public
is, rather than using [SerializeField] private
. If there are no AudioClips in the list, PlaySounds will simply disable itself; you may prefer to throw an error. Additionally, you’ll notice that an AudioSource component is necessary, but not required in code via [RequireComponent(typeof(AudioSource))]
. (Instead, PlaySounds logs the issue for you.) This is deliberate, to keep Component coupling loose while trying things out, but may not be what you want in production.
I encourage you to use these, without limitations, in your own work. (But if you do something cool, please do let me know!)
Lillie is the Keeper, now available for iPhone & iPad!
This is it! “Lillie is the Keeper,” the innovative new AR adventure game for iPhone & iPad, is live…
And best of all, it’s FREE, through January 6!
Explore your own virtual lighthouse, and live Lillie’s story. I’m proud to bring this playable short story to you, and hope you enjoy your time at Switch Rock Light Station.
New kind of game. Better explain.
A link to this video will sit in the Game Menu of “Lillie is the Keeper.” AR Kit can be finicky at the best of times, and tracking losses mean glitching. I hope this helps new players.
Bonus: A repeating carpet pattern can confuse it terribly, but drop something on the floor to break it up, and the app gets quite a bit happier. #SockHack
Minus a few things out of my control, it looks like Lillie is the Keeper is only a week or two from release.
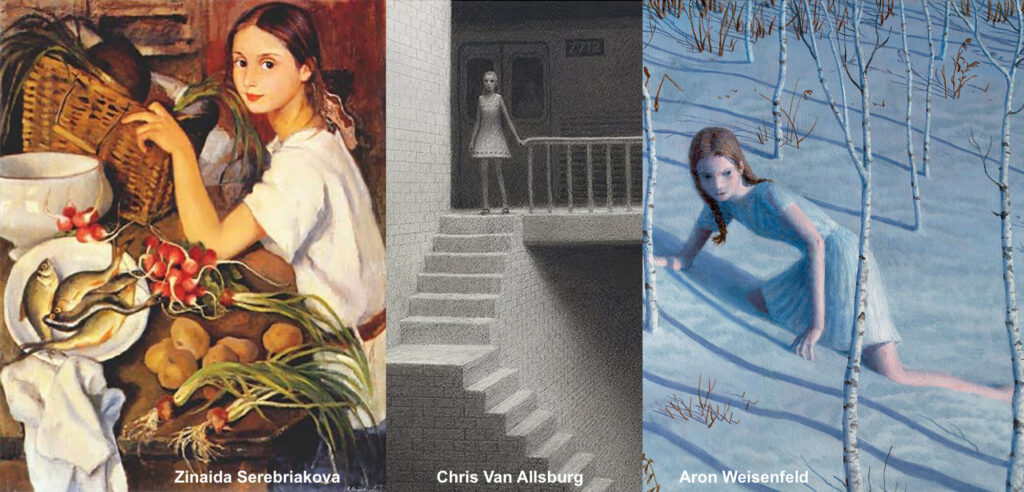
Without a AAA-scale production pipeline, an appropriate art style needed to be developed to maximize impact while easing development–especially since I’d be modelling everything myself. Low-polygon games like Black Book and Röki have had great artistic success, while voxel-style titles like Minecraft and Roblox have enjoyed great commercial success, both styles riding the “high-tech low-tech” aesthetic of my old professor. Having observed that modern iPhones (even in web browsers, via WebGL) can easily draw a very large number of polygons, I decided to lean instead into something I call “rounded realism.” This style builds on the work of artists like Aron Weisenfeld, Zinaida Serebriakova and Chris Van Allsburg, in which figures and objects are realistically textured and atmospherically lit, but conform subtly toward primitive solids.
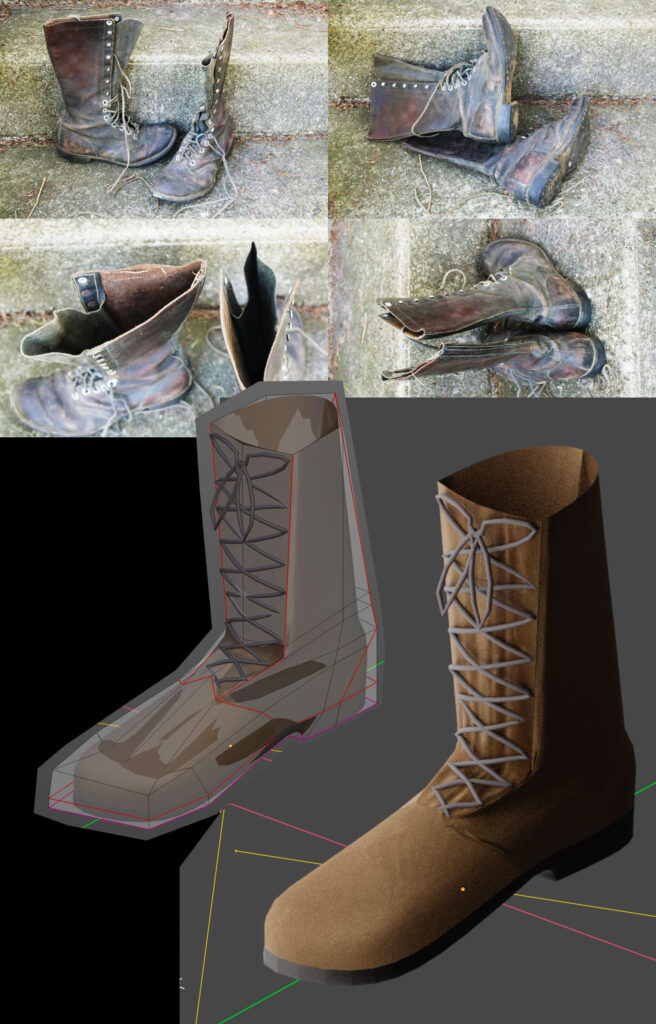
In practice, rounded realism means that textures are realistic (photographic, when possible, utilizing Adobe Capture) and lighting is clean and realistic, but unimportant details are missing. Corners are bevelled, with sizable flat surfaces between. Visual outlines are clean and geometric, with a minimum of visual clutter. Faked volumetric lighting and other transparent elements are used extensively to create depth, running against the orthodoxy that their layered overdraw will kill iOS performance.
Clothing was some of the most demanding work. Mayme’s Edwardian sailor bodice outfit closely follows a custom build by Katja Kuitunen, based on a vintage piece from the era. It’s constructed from Kuitunen’s sewing references–with help from my girlfriend, who is brilliant with these things. The skirt (a separate piece, despite the shirt’s matching fabric) is a simple fabric tube, gathered about the waist, with realtime cloth simulation. Everything is designed to be plausible, but clean, geometric, and simplified.
It’s been a big job, and there’s more I’d like to do for a 1.1 release. The only models from the game that aren’t my own are human bodies built with MakeHuman, though even they’ve been resculpted and touched-up. Clothing and hair are all hand modeled.
Lillie is the Keeper is a role-playing game, but it’s not an RPG. Like many games, you play as the title character, and see the world through her eyes (and hear yourself speak in her voice, and hear the voice in her head). Minus the AR gimmick, it’s a very conventional style of play. What I find odd, on reflection, is that this type of game is not called a “Role Playing Game”–and what is involves very little role-playing.
It’s a product of evolution, like all inexplicable things. Pen-and-paper RPGs were supposed to model all aspects of playing a character, though in practice most players focused on stats as a means to an end: that of increasing said stats. People “gamed” role-playing games, rather than role-playing them.
Sure, some people didn’t (and don’t) play them that way, and there are a number of role-playing systems that focus very sharply on driving character interaction rather than combat (somewhat including my own) but when the nascent digital game developers needed a template for long, multicharacter games, they borrowed liberally from the established pen-and-paper RPGs.
The real game loop is: boost numbers so you can unlock more content and boost more numbers. Even incredibly good story-driven RPGs like Lunar: Silver Star Story are fundamentally stat boosters with unspooling scenery. Very little of your time is spent inhabiting the mind and game world of the title character. Most often, the title character’s mindset is as bland as possible, to serve as a passthrough for the gamer. (Successfully un-personifying “you” as the main character was one of the many unsung triumphs of Myst.)
I call Lillie is the Keeper a “Myst-like.” It’s an out-and-out brag posing as a point of reference, even if it’s not 100% true. Myst has been misunderstood for 30 years, because its imitators, from Obsidian to The Witness, have failed to understand the importance of aligned atmosphere, the value of stillness, and the fact that walking around an empty place solving puzzles isn’t any more compelling than doing either activity solo—hence puzzle games and “walking simulators.” In Myst, the “puzzles” are just broken machines of a perfectly recognizable vintage. Within the calm loneliness of the game’s sound, pacing and art, there’s not even a sense that they need to be fixed (at least until the puzzling discovery of the imprisoned brothers). The opening act of the game makes clear that this is a game for a certain type of player: Not a twitch gamer, nor even a problem-solver, but a wanderer. A dreamer.
LitK tries to be this. It tries to be a positive depiction of an individual with a mental health issue. It tries to be an innovative new use for AR. It tries to be an interesting short story. It also tries to be a role-playing game.
Do we need a new term? How about “character-playing game?”
A lot of what I enjoy about games is the escapism: losing myself in another place, another time, another me. I can’t be the only one, can I?
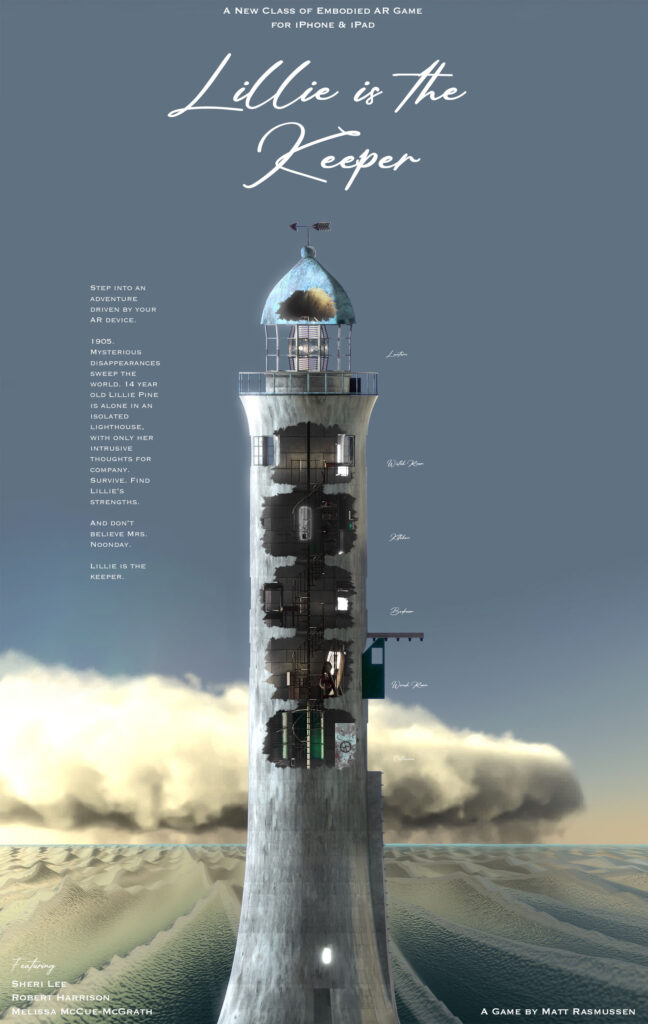
You’ve always wanted a lighthouse. A contained, liminal space at the edge of the world, between sea and sky. A literal beacon in the night. I can put one in your pocket.
Lillie is the Keeper (LitK) is an upcoming Myst-like game played in AR on an iPhone or iPad. You’ll take on the role of Lillie Pine, a 15 year old girl shipwrecked in an empty lighthouse following a mysterious calamity in 1905. With your iOS device, you’ll explore the lighthouse by moving about your real-world space.
The game is structured as a short story, beginning before it begins and ending after it ends, in eight play vignettes or levels. The main character, Lillie, suffers from intrusive thoughts, which we hear as an older, more severe, highly critical version of her own voice.
The game is built in Unity 2021.2 and runs in iOS 14, using AR Foundation 4.2 as a wrapper over AR Kit 5. It is a solo effort by the author, including writing, voice direction, modeling, coding, rigging, sound editing and visual design, and stars actors Sheri Lee (Hearts of New England), Robert Harrison (The Equalizer) and Melissa McCue-McGrath (BewilderBeasts).
My game “Lillie is the Keeper” needed a small-scale ripple texture for an ocean shader. The in-game shader makes use of a 3d texture, UV sampled in world space horizontally, with the sampler moving up through the texture’s z axis over time to animate it. A first version used the old 4d rotation trick for repeating noise, in which a 4-dimensional noise texture is rotated 360 degrees around the Lovecraftian W axis between UVs 0 and 1. It tiled horizontally, but when the 3d texture repeated (up the z axis) there was an ugly little crossfade between unrelated frames.
I use Bforartists, a UI-focused fork of Blender, for 3d graphics and some texture creation–like this project. It doesn’t fix every pain point, but I can’t recommend it highly enough. This method, and the attached .blend file, will work just the same in mainline Blender.
As there’s no 5d noise function in the shader nodes (Shading tab), for the improved ripple texture we must go back to fundamentals. Ken Perlin’s original version of a solid texture–Perlin Noise–has a lot of complicated math behind it, but geometrically is pretty straightforward: Create a 3d grid, place a point at a pseudorandom location within each box, and apply a function to smoothly interpolate between the points in all three dimensions. (As best I understand it, Perlin’s own improvement, Simplex Noise, replaces the grid with tetrahedrons–triangular pyramids–but that’s at least Whisperer-in-Darkness-grade math for me.)
There is a shader node that can perform similar interpolation: Point Density. Note that you’ll have to switch your renderer to Cycles in order to use it. In Eevee it’ll just output black. This is poorly documented and the interface won’t help you.
The Point Density node takes the vertices of a mesh (or particles of a particle system) and outputs a greyscale representation of their density. With it, it’s possible to create noise from your own handmade 3d grid of points–like an array of cubes. Since you’re creating the vertices yourself, making them repeat is as simple as replicating them in x, y and z–for instance, with three Array modifiers.
To start out, create a 1x1x1 cube. Pop into Edit Mode and set the cube’s origin to its leftmost, bottom-most, hindmost vertex. Back in Object Mode, move it to -1.5, -1.5, -1.5. Just one cube (8 points) won’t look like much as noise, so we’ll double it in all three dimensions. Scale your cube to 0.5, 0.5, 0.5. Now double it in X, Y and Z with three Array modifiers: Add an Array modifier, set the Count to 2, and the Relative Offset’s Factor X to 2. Add two more Array modifiers, for the Y and Z axes (Relative Offset Factor Y to 2 on the second, and Z to 2 on the third).
We can randomize our cubes’ vertex positions with another modifier: Displacement deforms the mesh based on a texture. The app can generate this noise texture for you. Go to Texture Properties, create a new Texture, set the type to “Clouds,” and select “Color” rather than “Greyscale.” Go back to your cubes’ modifiers, add a Displacement modifier (after the three Array modifiers), set the Coordinates to “Global,” the Direction to “RGB to XYZ” and the space to “Local.” Play with the Strength and Midlevel properties if you want more distortion in your cubes.
Now you’ve got a box of eight distorted cubes, sort of down in the lower left-hand corner of the world axis. Let’s replicate them with three further Array modifiers: After your Displacement modifier, add an Array, and set the Count to 3. Since the Displacement modifiers are messing with the overall dimensions of the cubes, deselect Relative Offset and select Constant Offset. Set Distance X to 2. Now, make two more Array modifiers, for Y and Z, also with Constant Offset Distance 2 (in Y and Z respectively). You should now have a repeating set of distorted cubes in all 3 dimensions.
Hide your cubes (including from renders–the camera icon in the outliner). Create a 1×1 plane at the origin. Delete any lights in your scene. Set the camera’s output to a texture-friendly square, like 512×512 pixels (printer icon, Resolution). Set the camera to Orthographic (camera icon, Lens: Type) and aim it straight on to your plane. Create a new Material on the plane (material ball icon, New).
Switch to the Shading tab with your new Material, delete the “Principled BSDF” node, and instead add a “Point Density” node. Select “Object Vertices” rather than “Particle System.” Under Object, select your mesh of repeating distorted cubes. Set the Space to “World Space,” the Radius to 0.5, and the Interpolation to “Cubic.” Drag the node’s Density output straight to the Material Output node’s Surface input.
That’s it, in a nutshell. Move your plane between -0.5 and 0.5 Z, and the noise pattern will repeat. It’ll also wrap around at the X and Y edges.
You can create finer-grained noise by doubling your cubes and halving their scale. Or double-doubling and half-halving. Or double-double-doubling… You get the idea. For each iteration, half the scale, double the Count of your first 3 modifiers, then double the distance between them with your last 3 modifiers. I also recommend halving the Size attribute of your Clouds texture each time.
Note that at larger numbers of cubes (say 16 or 32 per box) the “Point Density” node’s Resolution attribute will need to be increased. Add 100 at a time, until there’s no visible difference adding 100 more. Accept the hit in performance. (If you see seams in the final rendered texture, too low a Resolution setting here is usually the culprit.)
Download the Bforartists/Blender file here: Repeated Tiled Noise v2.blend
In the file, the Demo collection will demonstrate the simple version, while the Production collection is my final water ripples setup. In the simple version, there are also some unused shader nodes demonstrating a setup for combining noise at different scales to create more complex output–again, just like Perlin Noise.
The Production collection, my own version for water ripples, does a few additional things. I’m creating the 3d texture in Unity, which requires each frame (vertical slice of the 3d noise) to be stacked side-by-side in a single image file. As such, I’ve added an Array modifier to the plane I’m rendering, so that it becomes 16 side-by-side squares stepping up between -0.5 and (almost) 0.5. (Almost 0.5, because step 17 would be 0.5–and we don’t want to repeat a frame. The app will do basic math when setting fields numerically, so entering “1/16” will give you 0.0625…) The orthographic camera is adjusted to render it all in one frame. Within the shader graph, I’ve made the position Vector fed into the “Point Density” node a combination of the world Z coordinate and the planes’ UV coordinates (standing in for X and Y). Since I want a lot less change as the noise loops in the Z axis than in the horizontal directions, I’ve not halved the number and scale of the cubes along the Z axis, and I’ve split the Displacement modifiers’ textures into three different Greyscale textures accordingly. There’s an RGB Curves node added after the Point Density node to make the interpolation more wave-like. Finally, the greyscale heights have been translated into a Normal Map via a Bump node.
Smooth sailing!
The protagonist (we never came up with a name for her) moves along a 2D plane in a 3D environment, with generally realistic platforming movement inspired by Flashback: The Quest For Identity. The system uses the Unity physics engine, manually controlling the character’s momentum to create grabbing and climbing, and adds quadratic drag for “crunchier” falling per Bennet Foddy’s 2015 GDC lecture. I started by modifying an existing character control script, the final system ended up a complete rewrite.
Character interaction is controlled with Layers. If an object has a Collider and is in Layer “Walkable,” the protagonist can traverse it, including ledge grabbing when appropriate. Rope climbing is the same, only with Layer “ClimbableRope.” (Wall climbing was also implemented, but cut for time.)
Want to play with it? You can download the Unity package here. Feel free to use the controller scripts & prefab setup for whatever you’d like (but not Anastasia Jacobsen’s cute character model please!)
Footprints are based on the method used in Röki. At the animation frames of the walking and running cycles where the foot first makes contact with the ground, an animation event is called with a boolean indicating left or right foot. A Projector Prefab with a Normal Map Texture is then instantiated at the location of the foot’s Bone. The Prefab has its own script, which fades the Normal Map out over 10 seconds, and then self-deletes.
The Solus demo is available on to download and play on Itch.io (Mac & Windows).
Anastasia Jacobsen’s concept for Solus is an attempt at a semi-hard-sci-fi take on Alex McDowell’s “Planet JUNK” collaboration. The Earth has somehow stopped rotating, creating a 6 month summer/winter cycle and migrating the oceans away from the equator.
In the demo, the player journeys down into the sand-buried remains of a skyscraper looking for water. For visual interest (and irony) I suggested the Futurist city of Brasilia which went over well with the team: Niek Meffert, Anastasia Jacobsen, Rosa Friholm, Ida Lilja, and myself. I was Technical Artist and Lighting Designer. (Solus was the first of two Planet JUNK collaborations. Many lessons learned were later applied to Shrooms.)
Solus uses Unity’s High Definition Rendering Pipeline (HDRI), allowing a wide variety of realistic volumetric effects—the simulation of light’s interaction with microscopic particles suspended in air, like smoke, water droplets and dust.
Topside, the lighting is very simple. There’s a Directional Light (sun) and not much else. Fill lighting is created by Global Illumination from the skybox. Blowing sand is created with the Unity VFX Graph. A number of post-processing effects are added, including Bloom, Tonemapping, Color Curve adjustments (for a more cinematic “desert” look) and a custom sparkle shader in the brightest areas. A faint volumetric Fog pervades the scene, to create a dusty atmosphere. Slightly behind the main plane of action, a second “thicker” Fog Volume is added, faded from bottom to top, to make the background distances appear greater and create a Bryce-like height fog effect.
The underground lighting is primarily driven by a Point Light attached to the character’s lantern. The Volumetric Fog is thicker, increasing with depth into the buried skyscraper. An extremely bright Spot Light shines in through the entrance, volumetric and colored bright blue to contrast with the warmer lantern light. A similar, very narrow bright blue Spot Light shines down from the top of the first elevator shaft, as if a tiny stab of sunlight were blazing in through a chink in the roof. Farther down, mushrooms glow with an eerie green Emissive Material, casting light onto their surroundings via covert green Area Lights.
The theatrical darkness demanded that a final Light be added, to only be activated while editing the scene—literally named “Work Light.”
The Solus demo is available on to download and play on Itch.io (Mac & Windows).