Creating Realistic Cloudy HDR Skyboxes

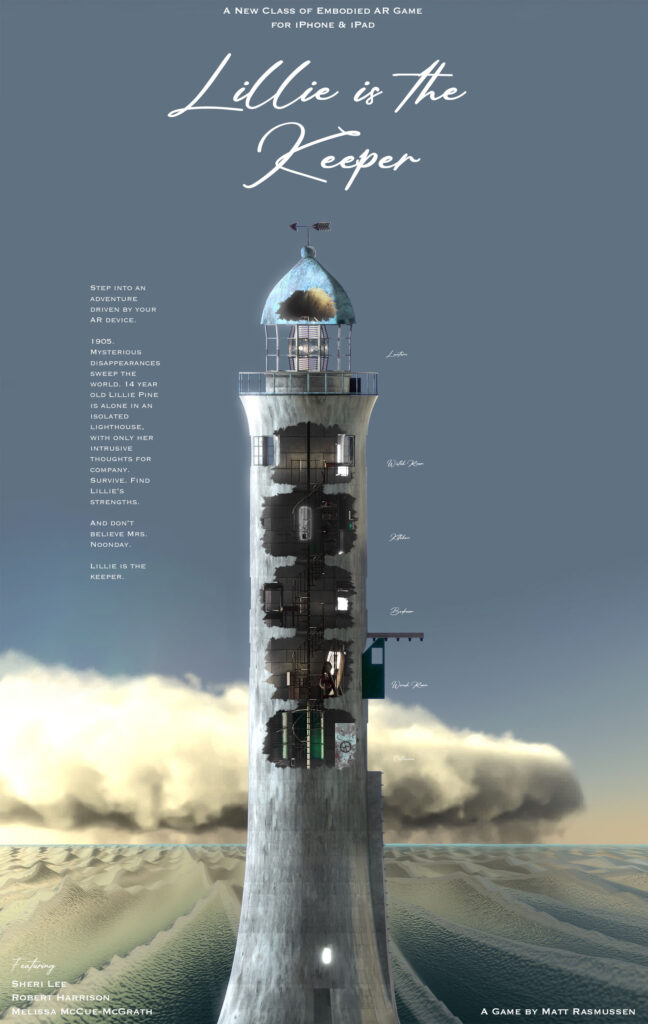
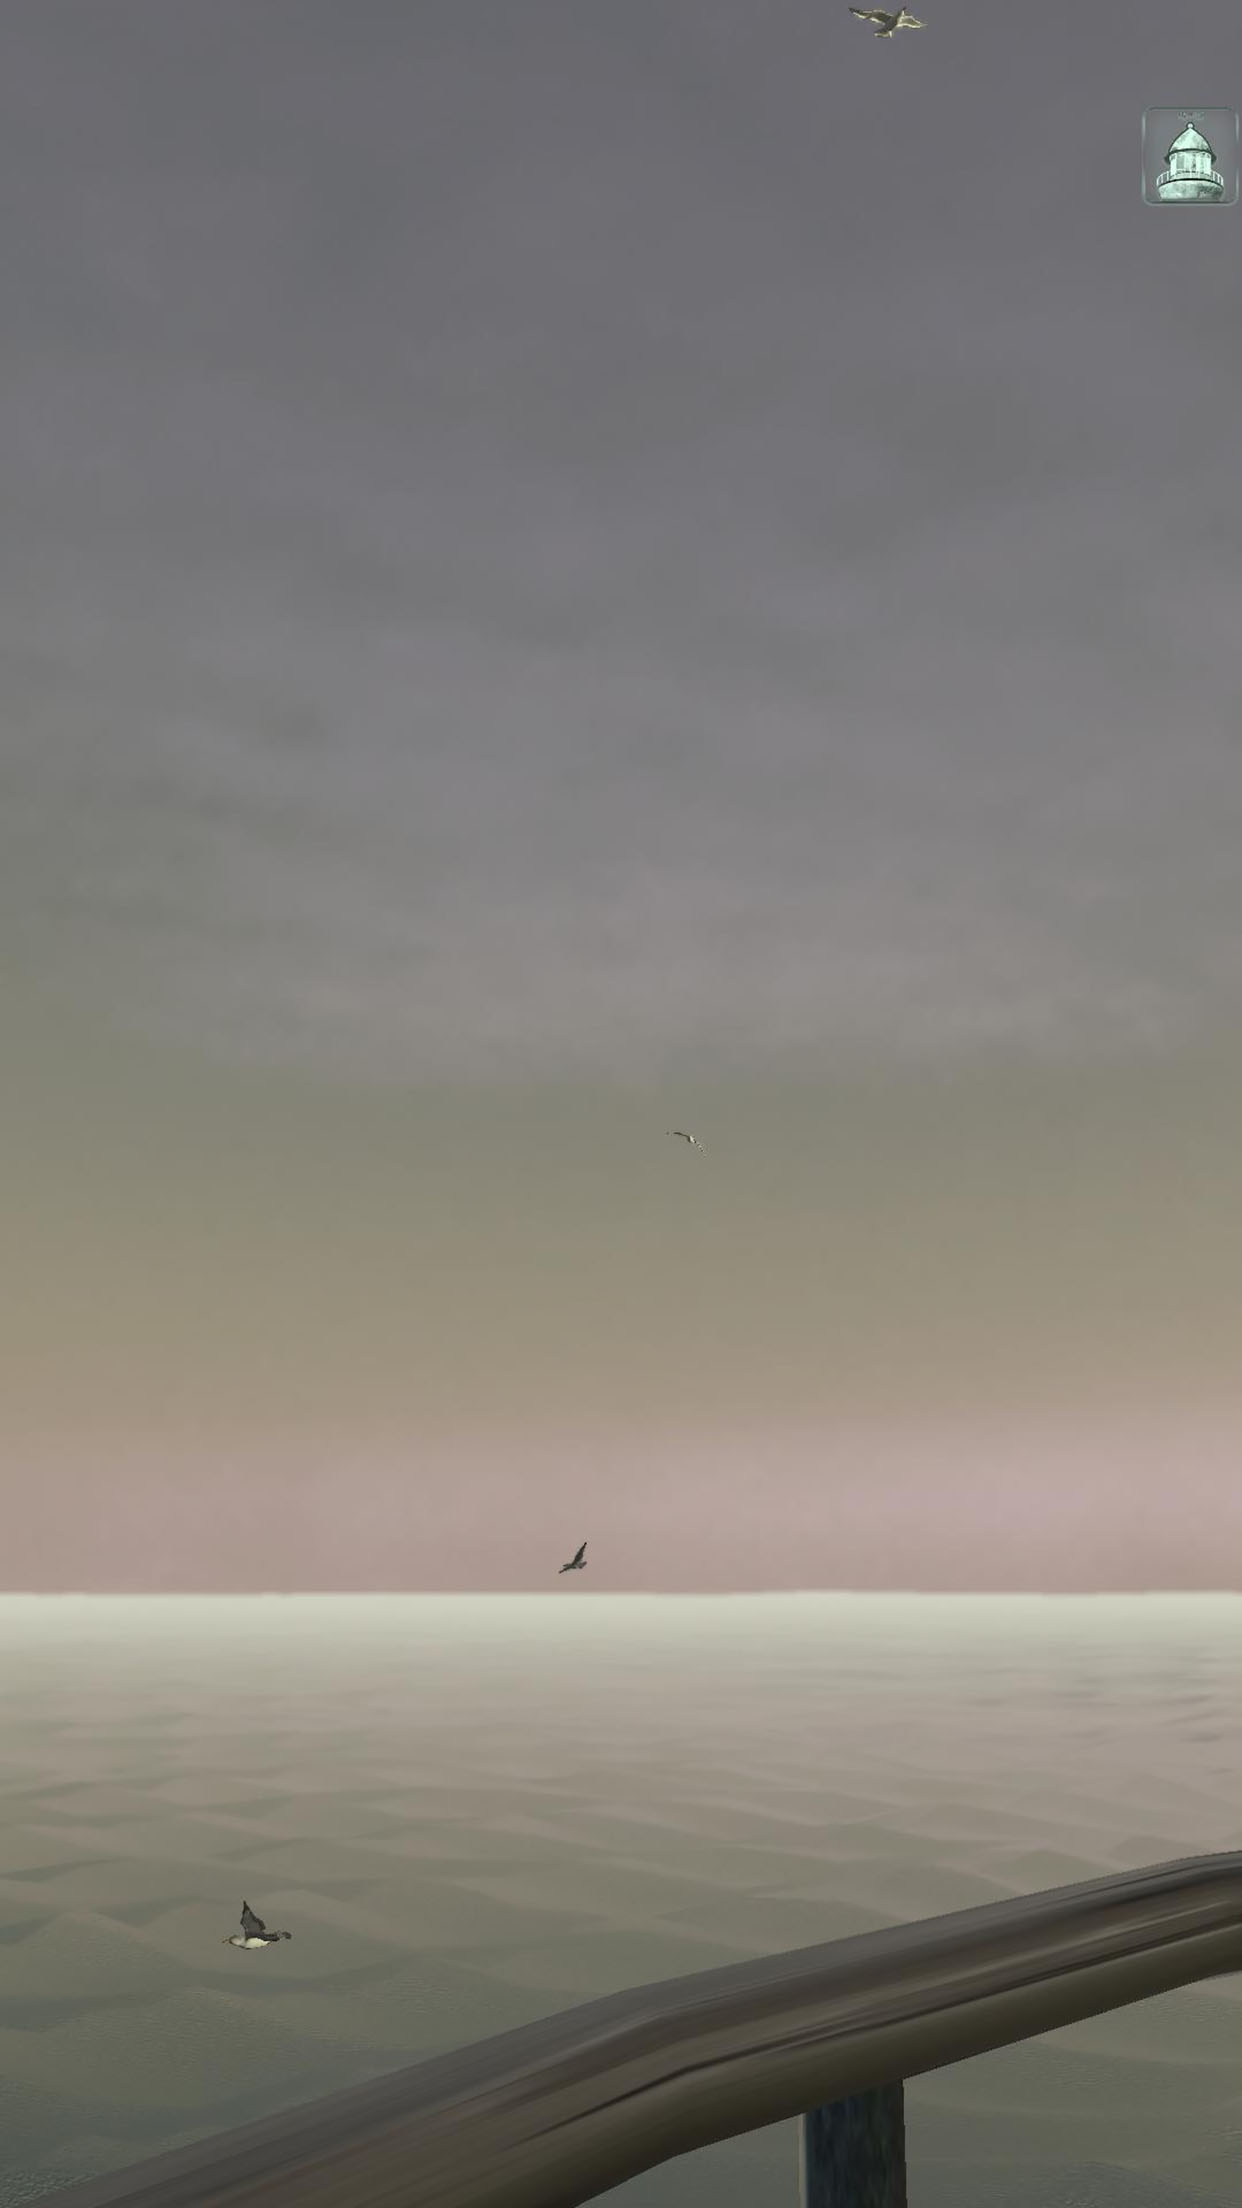
Each level of “Lillie is the Keeper” features a unique high-definition skybox texture. These Unity cubemaps are rendered in Bforartists, the UI-focused fork of Blender. Here’s how you can create your own.

Create a new scene in Bforartists, and switch the Render Engine to Cycles (camera icon: Render Engine). Add a single Directional Light, to act as the sun. Model a gently curving lenticular piece of geometry, about 5 km in radius, to act as the ground/ocean, and texture it appropriately.

If you’re interested in accuracy, you can enable an add-on called Sun Position to set your sun angle for the date, time, latitude and longitude of your game scene (Preferences menu: Add-ons: Lighting: Sun Position).

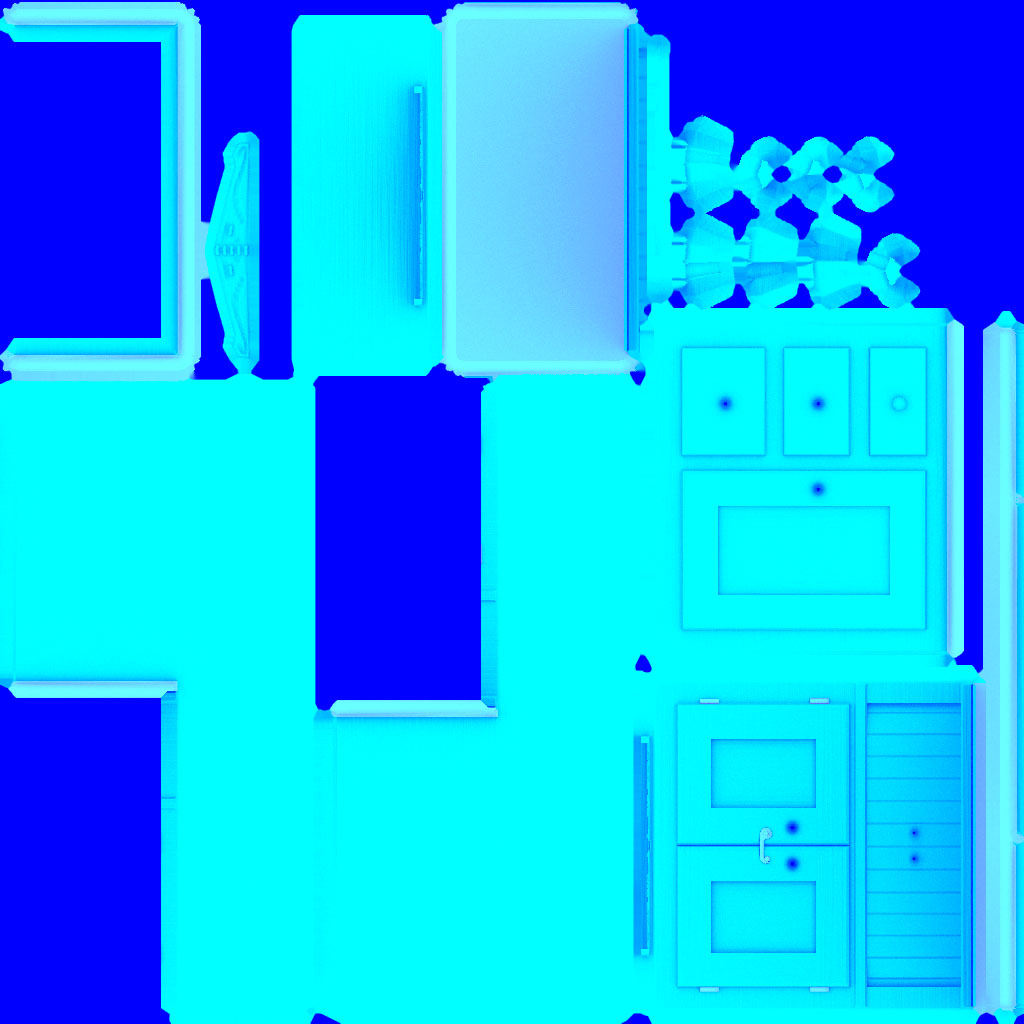
Switch to the Shading tab, and select the World (background) shader. Create a Sky Texture node. Set it to Preetham, and link its output to the World Output node’s Surface input.

Clouds

Next, model your clouds (as ordinary geometry) in rough form. Hide them from rendering. Create a Volume object (Add menu: Volume: Empty). Go to the Volume’s Modifiers tab (wrench icon), and add a Mesh to Volume modifier. Set the Modifier’s Object to your hidden cloud geometry object. What you’ll get is a Minecraft-like blocky cloud. Increase the Voxel Amount to reduce this blockiness somewhat–try 1024.

To fully remove the blockiness and get cloudier edges, go back to the Modifiers tab, and add a Volume Displace modifier. Go to the Texture tab (checkerboard icon). Create a new texture, and set its type to Clouds. Go back to your Modifiers, and assign the cloud texture to your Volume Displace modifier. Adjust the Texture and Modifier settings until you like the results.

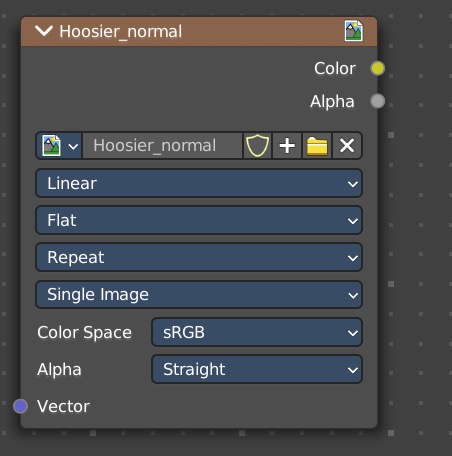
Go to the Material tab (crash test dummy head icon), create a new material, and assign it the Principled Volume shader. Adjust the material properties to your desired cloud appearance. (This can take a while. Start with a Density of .001-.005. You’re welcome.)

Rendering

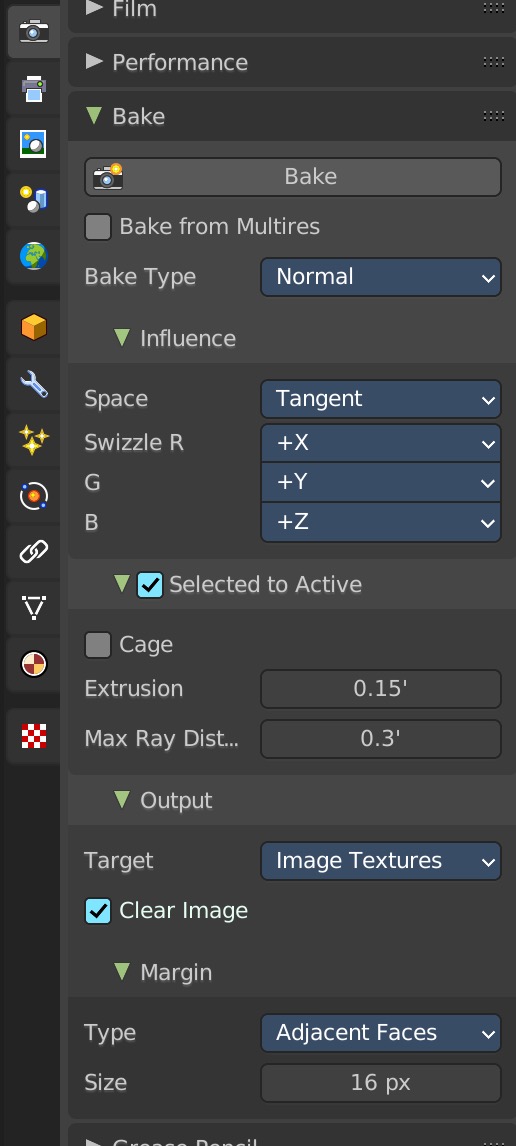
Finally, set up your camera to render the six faces of the cubemap. In the Data tab (camera icon) set the Field of View to 90 degrees. In the Output tab (printer icon) set the Resolution to a power-of-two square, like 1024 or 2048. Set the Frame Range to 0-5. Select a folder and filename to render to, setting the File Format to OpenEXR (.exr), in order to save HDR color values. Go to the Animation tab, and animate your camera to be rotated as follows on frames 0-5 (x,y,z):

  • 0: 90, 0, 270
  • 1: 90, 0, 90
  • 2: 180, 0, 0
  • 3: 0, 0, 0
  • 4: 90, 0, 0
  • 5: 90, 0, 180

Render all six frames (Render menu: Render Animation). This would be a good time to take a walk around the block. Notice the blackbirds.

Building the Skybox

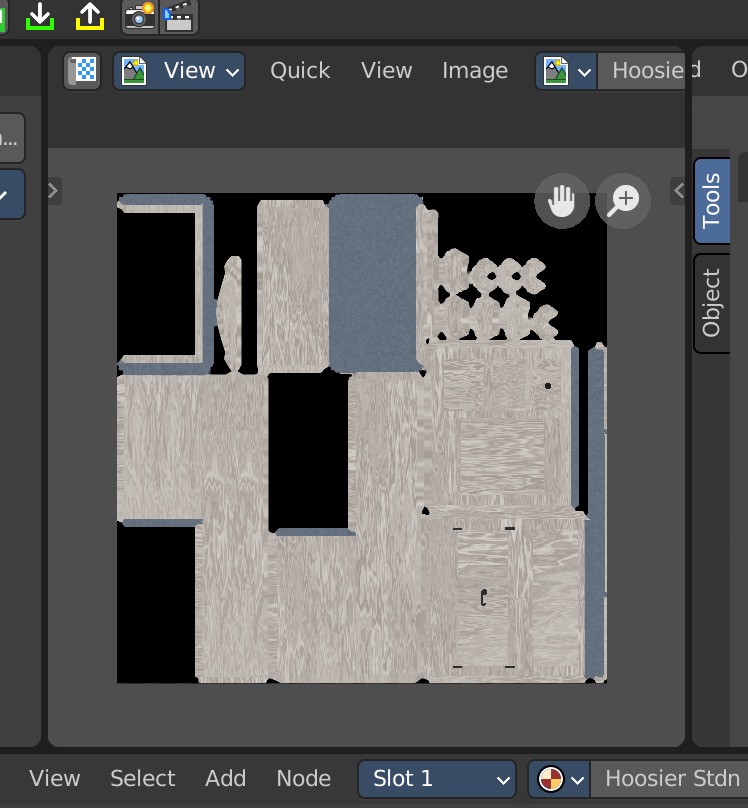
When you get the renders looking how you want, open your frames in an image editor and arrange them in one big vertical strip. Frame 0 should be at the top, and 5 at the bottom. Save this, again, as an OpenEXR file.

In Unity, import the strip image. Click on the texture to see its Import Settings in the Inspector. Set the Texture Type to Default, the Texture Shape to Cube, and check Fixup Edge Seams.

Finally, create a material. Set the Shader to Skybox/Cubemap, and under Cubemap (HDR), select your texture. In your Scene, open the Lighting panel (Window menu: Rendering: Lighting). Click the Environment tab, and assign your material to Skybox Material.

Bonus

Download my .blend file for LitK level 5: Light right here.

Out Now: Lillie is the Keeper v1.4 “Life”

New in this BIG update:

  • Seagulls
  • New Secret to find: Dreams of Flying
  • Streamlined setup and tutorial
  • Seafoam, wave staining, living space improvements, new music, and dozens more improvements
  • Engine upgrade to Unity 2022, for new features & improved performance
  • Bug fixes

And to celebrate 1 year on the App Store, LitK is on sale this weekend through January 15.

Fix Missing Materials in Blender FBX Exports to Unity

There’s a bug in the FBX exporter for Blender 3.x (and now 4.x) that doesn’t export materials on instanced meshes. While the original mesh imports into Unity just fine (and remaps materials correctly under the importer’s Materials tab) duplicate instances of the same mesh import with only the default Lit material. If you’re (perhaps oldschool) like me, and use a lot of instancing to save disk space, this is a problem.

Here’s a Unity Editor script to fix things: FBXFixerScripts.zip

It supports Undo, regular and skinned meshes, and will walk down the hierarchy as far as it needs to. Can take a few seconds to grind through big hierarchies. Works on my ultra-complex Lighthouse prefab, and all the others I’ve thus far thrown at it. If you find a bug, let me know!

Here’s how to use it:

  1. Download & unzip the files.
  2. Add FixFBXImportMatsUI.cs to your project’s Editor folder. (If your project doesn’t currently have one, add a folder named “Editor” to your Assets folder.)
  3. Add FixFBXImportMats.cs to your project, wherever makes the most sense.
  4. After importing an FBX with missing Materials, open the Prefab or drag it into a Scene, and add a FixFBXImportMats Component to the root of the import’s hierarchy.
  5. Assign the Default Material you need replaced to the Component’s slot.
    • The default Material will vary depending on your render pipeline and import settings.
    • If using URP, it’s usually the Lit material, located in Packages: Universal RP: Runtime: Materials.
    • A quick way to find it is the select an instanced mesh in the hierarchy, and click on the Material shown in the Editor.
  6. Leave Clean Up After checked to have the Component remove itself after running.
  7. Click Fix Materials.

Lillie Can’t Do a Thing With Her Hair

Download the .blend file here.

In LitK, Lillie’s messy hair becomes visible when you don’t have look-around control. (I’m bored with letterboxed cutscenes.) The original hair textures were hand-painted, before “rounded realism” really took shape. There’s a realtime hair package in Unity, but it’s heavy for iOS devices. I decided to try rendering out some more realistic textures in BForArtists (Blender).

How does a gen-x-lennial go about learning a new tool? Try to find the one non-video tutorial Google still indexes. Skim it. Dive in. Check the documentation. Get something you’re reasonably happy with. Junk it, and start over from scratch. Get something maybe actually useable. Tweak it until you run out of time.

The results aren’t bad:

Then, defocused in Photoshop:

The Cycles renderer and Principled Hair (Transmissive) shader work together nicely. The tweaking options could use some love. (WTF does “shape” of a noise function mean?) Always use the BForArtists manual, not Blender’s.

“Lillie is the Keeper” 1.4 will bring many bigger improvements. We’ll look at those soon.

Unity VFX Graph Experiments

VFX Graph is Unity’s high performance pure-GPU particle effects system. I recently helped Chop Chop Games get a sizzle reel out for an upcoming card battler, which involved a fair amount of prerendered particle work in Apple Motion and Blackmagic Fusion. Looking at their competitors in the space, like Slay the Spire and personal favorite Black Book, got me tinkering again with VFX Graph.

It’s an impressive set of tools, but shader experience is definitely a prerequisite. You need to “think in GPU.” One great decision was making Animation Curves a first-class citizen in VFX Graph, allowing for a lot of nuanced per-channel animation. Getting particle motion properly punchy is always a challenge.

Shield Up uses two Animation Curves to Etch-a-Sketch the shield outline into being, then a mesh to fill the inside. The sparks are sub-emitted from invisible spawner particles.
Shield Loss uses a single, big flipbook-textured particle for the shield, with the burn line and ash lines animated with Animation Curves.
Vine Attack uses URP quad particles and particle strips with normal maps to fake some depth. It also uses a pair of useful subgraphs: Point Force and Orbit.

You can download these all in a .unitypackage here. The download also includes a couple of potentially useful subgraphs. Point Force can be positive, to push particles away from a given point, or negative, to suck them in. Orbit can also be positive or negative, to control the direction particles orbit around a center point.

Demonstration of the Point Force and Orbit subgraphs.

Lillie is the Keeper 1.2 Released

LitK 1.2 is now available on the App Store. It features:

  • Revamped kitchen with period furniture
  • Enhanced UI
  • Improved AR setup experience
  • New event system to support current & future game enhancements
  • Refactored, more reliable UI system
  • New intrusive thoughts
  • More Acre Courier content
  • Bug fixes & small visual improvements throughout

Baking Textures From Bforartists/Blender to Unity

Unlike many tasks, Blender’s powerful but bafflingly-designed texture map baking tools are not improved by its UI-focused fork, Bforartists. Here’s how to use them, with a downloadable example (the Hoosier Cabinet from Lillie is the Keeper‘s upcoming 1.2 release). Click here to download the cabinet model with textures.

Honestly, if I haven’t done it for a while, I can’t remember how the process works, so this will be as much a cheat sheet for me as you.

Bake options, in the Render Properties sidebar

Since it’s not our focus, we’ll skip quickly through the high-to-low-poly sculpt method. You create a low-polygon model, unwrap its UVs, and make a duplicate (using Duplicate Objects, not Duplicate Linked) in the same world position. Hiding the original, you sculpt a high-detail version, to be baked onto the original as (at minimum) a Normal Map. You can also use Bforartist’s Shading tab to create texture, displacement and color, even applying multiple materials to your high-resolution mesh. Since the UVs don’t have to match between the high and low-poly versions, effects like differently-oriented wood grain are just a matter of mucking with the high-poly sculpt’s UVs.

I’m also largely assuming you’re familiar with importing textures into Unity.

Baking a Normal Map

An Image Map node
  1. In Object Mode, select the high-poly model.
  2. Multiple-select the low-poly model as well (on Mac, Command-click, in the scene hierarchy window).
  3. Under Render Properties (the camera icon in the sidebar) set Render Engine to Cycles. (Baking is not supported in Eevee or Workbench.)
  4. Farther down in the Render Properties sidebar, click to expand the Bake options.
  5. Set Bake Type to Normal.
  6. Check Selected to Active (if it’s not already checked).
  7. For Extrusion, enter the minimum distance the baking system will need to “puff out” your low-poly model’s surfaces to completely enclose your high-poly sculpt. (This may take a few goes, before you hit on the right distance to catch everything without artifacts.)
  8. Max Ray Distance I usually set to twice the Extrusion.
  9. Under Target, select Image Textures.
  10. (Wait, shouldn’t there be a control here to select which texture to bake to? Yes, but, Blender.)
  11. So instead, switch from the Main tab to the Shading tab.
  12. Make sure your low-poly model has a Material of its own.
  13. In the View window, create a new texture (Image menu: New) or open an existing texture to overwrite (Image menu: Open…).
  14. Down in the texture nodes window, click Add: Texture: Image Texture, and drop the node into your workspace. Don’t bother connecting it to anything.
  15. In the Image Map node’s Image Browser menu (picture icon) select the Normal Map texture you’ve just created/opened.
  16. Select the Image Texture node itself. For some reason, this is how you choose which texture to bake to. If an Image Texture node is hilighted in the node workspace, baking will write to it. BE CAREFUL: It’s easy to accidentally bake to the wrong texture, if you’re using texture maps in your Material.
  17. Back in the sidebar, click that big Bake button.
  18. If the results are good, save the texture map from the View window. (Image menu: Save Image.)
  19. If not, play with your Extrusion parameter, and/or your sculpt geometry. Make sure your normals are facing the right way. (The Normal Map baker doesn’t seem to ignore backfaces.)

Baking an Occlusion Map

Ambient Occlusion darkens cracks and crannies in your surface. Most importantly, it keeps the inner edges of your Normal Maps from reflecting a bunch of weird phantom light.

It’s possible to bake Ambient Occlusion (as well as Diffuse and others) from a single model to itself–no high-poly needed. To do this, simply select the model, go to the Bake options and uncheck Selected to Active.

  1. Follow the same procedure down to Step 5, but now set the Bake Type menu to Ambient Occlusion. If baking high-to-low, keep the same Extrusion and Max Ray Distance settings that worked for your Normal Map.
  2. Follow the rest of the procedure above. You can reuse the Image Texture node, just make sure to switch it to the Occlusion Map texture you create/open. Remember to save the texture after the bake.

Baking a Diffuse Map

A baked Diffuse Map, in the Shader tab’s View window

If you’re comfortable with the node-based shader system, and applying multiple materials to a mesh, you can do a lot of interesting texturing in Bforartists.

Typically, you’ll be baking Diffuse maps with a single model, rather than high-poly-to-low. Again, simply select the model, go to the Bake options and uncheck Selected to Active.

  1. Follow the same procedure down to Step 5, but now set the Bake Type menu to Diffuse.
  2. Chances are you don’t want to bake your shadows and global illumination into the Diffuse Map. Under Contributions, uncheck Direct and Indirect.
  3. Follow the rest of the procedure above, with the same reminders.

The Prestige: Baking a MOxS Map

A channel-packed “MOxS” texture for URP

This one’s on Unity. In the Universal Render Pipeline (URP), there’s an awkwardly not-quite documented way to pack three monochromatic textures into one, saving two texture taps per draw (and textures in memory). The four channel (RGBA) texture packs a Metallic Map, Occlusion Map, an unused channel, and a Smoothness Map into one, I guess, “MOxS Map.”

  1. First we’ll need to bake a Metallic Map. Unfortunately, the Bake Type menu has no such option. We’ll get around this in the Shading node editor by temporarily piping our Metallic value into the Emission input (since it’s the least likely to already be in use) and baking an Emit Map:
    • For each Material on the model…
    • If there’s a node piped into the Principled BSDF node’s Metallic input, pipe it into the Emission input instead.
    • If it’s a constant value, just copy it into the Emission color’s V value (in HSV mode).
    • Set the Bake Type to Emit.
    • As above, create/open a texture to overwrite with the Metallic Map, select it in the Image Texture node, hilight the node, and click the Bake button. Save the texture.
  2. Next we need an Occlusion Map. Disconnect/revert any Emission changes you made in your Materials to create the Metallic Map, and bake an Occlusion Map as above.
  3. Finally, we need a Smoothness Map. We can’t natively bake this either, but we can bake its (literal) inverse:
    • Set Bake Type to Roughness.
    • Create/open a texture, bake the Roughness Map to it, and save.
  4. Combine all three textures in Photoshop (as follows) or another image editor:
    • Create a new document the same dimensions as your textures.
    • Open the Metallic Map texture, Select All, and Copy.
    • In the new document, click on the Channels tab, select the Red channel, and Paste.
    • Open the Occlusion Map texture, Select All, and Copy.
    • In the new document, select the Green channel, and Paste.
    • Open the Roughness Map texture, Select All.
    • Invert the image (Image menu: Adjustments: Invert) and Copy.
    • In your new document, create an Alpha channel (plus-in-a-box icon, at the bottom of the Channels tab).
    • Select the Alpha channel, and Paste.
    • Save as a Photoshop file. (PNG may try to knock out parts of the image based on the alpha channel, and Unity imports Photoshop files well.)
  5. In Unity, select the “MOxS” texture. Make sure sRGB (Color Texture) and Alpha is Transparency are unchecked. (This is a data texture, so we don’t want to adjust the colors to the current gamut, especially in a Linear Color Space project.)
  6. In your Unity Material (using the Lit, or Complex Lit shader) assign your MOxS texture to the Metallic Map input. Leave the Smoothness slider alone, as it won’t affect anything, and make sure Source is set to Metallic Alpha.
  7. Finally, plug the MOxS map into the Occlusion Map input as well. (The workflow feels off, but the shader seems to recognize the packed green channel as the one to use.)

Bunk – Downloadable .blend File

With the first of the planned updates out, I’ve improved some of the visual elements that were just sort of roughed in for the initial release. (Because if you wait until everything’s perfect, you’ll never ship.) I wanted to share a little of my process.

Really, Lillie. Make your own bed.

Here is the ZIP file. Everything is modelled in Bforartists, the UI-focused fork of Blender, and the file is 100% compatible with the mainline app. I use proxy Materials in Bforartists, as they’re easily replaced with native URP Materials in the .fbx file import dialogue. I find it more reliable to place unused/support items into a separate Scene Collection, and export the Active Collection from the .fbx export dialogue, rather than selecting items manually. Normally I do the bevelling by hand, but on the bunks I tried out the Bevel Modifier, followed by a light Decimate Modifier, to clean up unnecessary flat geometry. It works okay, and it’s quick, but the polygon count ends up higher than necessary. Because of the way Unity handles animations, the curtains are separate files.

The bunks are based loosely on photo references from the New Brighton Lighthouse. They’re meant to feel friendly and cozy, as they’re Lillie’s first sanctuary after the disastrous boat trip. In my head cannon (which I guess makes it the official cannon) we’re playing through Lillie’s memories, fears and anxieties. In “real life” she succeeded at all of these tasks the first time, but–like many of us–obsesses over what could have gone wrong. (Which are our in-game failures and resets.)

Useful Unity Components: PlaySounds

In this ZIP file you’ll find three C# scripts for Unity: PlaySounds.cs, PlaySoundsMultitrack.cs and PlaySoundsBySpeed.cs. The latter two are subclasses of PlaySounds.cs, and require the former in your project. These small, lightweight scripts are used throughout Lillie is the Keeper (along with a couple other subclasses that are dependent on features of the game).

Basically, they do everything that I wish Unity’s own AudioSource Component did by itself. Play through a list of AudioClips? No problem. Play a random clip from a list? Done. Play OnTriggerEnter()? One click. You can play a single clip or all clips, disable the GameObject after playing, trigger audio from an external script, and monitor playing status with UnityEvents or a simple bool.

Check the scripts’ headers for a full rundown of features and how to use them. You’ll also see helpful tooltips in the Unity Editor.

The two subclassed scripts, PlaySoundsMultitrack and PlaySoundsBySpeed let you do two additional things. With the former, you can swap between up to four wholly different sets of AudioClips. Think of a windmill randomly playing different sounds from a playlist at different speeds: a slow, creaky set of sound clips at lower speeds, and a higher, whooshier set at high speed. PlaySoundsBySpeed lets you specify a minimum velocity at which to trigger sounds, and scales the volume up from 0 to 100% at a maximum speed. (Setting both speeds equal always plays the sound at normal volume.)

There are a couple things you may want to customize. These are written for rapid prototyping, trying things out, and generally seeing what works. Just about everything that can be public is, rather than using [SerializeField] private. If there are no AudioClips in the list, PlaySounds will simply disable itself; you may prefer to throw an error. Additionally, you’ll notice that an AudioSource component is necessary, but not required in code via [RequireComponent(typeof(AudioSource))]. (Instead, PlaySounds logs the issue for you.) This is deliberate, to keep Component coupling loose while trying things out, but may not be what you want in production.

I encourage you to use these, without limitations, in your own work. (But if you do something cool, please do let me know!)

LitK: Here Goes Nothing

This is it! “Lillie is the Keeper,” the innovative new AR adventure game for iPhone & iPad, is live…

And best of all, it’s FREE, through January 6!

Explore your own virtual lighthouse, and live Lillie’s story. I’m proud to bring this playable short story to you, and hope you enjoy your time at Switch Rock Light Station.

Download on the App Store

LitK How-to Video

New kind of game. Better explain.

A link to this video will sit in the Game Menu of “Lillie is the Keeper.” AR Kit can be finicky at the best of times, and tracking losses mean glitching. I hope this helps new players.

Bonus: A repeating carpet pattern can confuse it terribly, but drop something on the floor to break it up, and the app gets quite a bit happier. #SockHack

Rounded Realism

Having cut my 3D teeth on Hash Animation:Master, I like working with subdivision surfaces, until it’s time for a high-to-low poly sculpt for normal map baking. It’s always interesting how clothing only looks “right” when it’s modeled after a plausible sewing pattern.

Minus a few things out of my control, it looks like Lillie is the Keeper is only a week or two from release.

Without a AAA-scale production pipeline, an appropriate art style needed to be developed to maximize impact while easing development–especially since I’d be modelling everything myself. Low-polygon games like Black Book and Röki have had great artistic success, while voxel-style titles like Minecraft and Roblox have enjoyed great commercial success, both styles riding the “high-tech low-tech” aesthetic of my old professor. Having observed that modern iPhones (even in web browsers, via WebGL) can easily draw a very large number of polygons, I decided to lean instead into something I call “rounded realism.” This style builds on the work of artists like Aron Weisenfeld, Zinaida Serebriakova and Chris Van Allsburg, in which figures and objects are realistically textured and atmospherically lit, but conform subtly toward primitive solids.

In practice, rounded realism means that textures are realistic (photographic, when possible, utilizing Adobe Capture) and lighting is clean and realistic, but unimportant details are missing. Corners are bevelled, with sizable flat surfaces between. Visual outlines are clean and geometric, with a minimum of visual clutter. Faked volumetric lighting and other transparent elements are used extensively to create depth, running against the orthodoxy that their layered overdraw will kill iOS performance.

Clothing was some of the most demanding work. Mayme’s Edwardian sailor bodice outfit closely follows a custom build by Katja Kuitunen, based on a vintage piece from the era. It’s constructed from Kuitunen’s sewing references–with help from my girlfriend, who is brilliant with these things. The skirt (a separate piece, despite the shirt’s matching fabric) is a simple fabric tube, gathered about the waist, with realtime cloth simulation. Everything is designed to be plausible, but clean, geometric, and simplified.

It’s been a big job, and there’s more I’d like to do for a 1.1 release. The only models from the game that aren’t my own are human bodies built with MakeHuman, though even they’ve been resculpted and touched-up. Clothing and hair are all hand modeled.

A Little About Role-Playing Games

Lillie is the Keeper is a role-playing game, but it’s not an RPG. Like many games, you play as the title character, and see the world through her eyes (and hear yourself speak in her voice, and hear the voice in her head). Minus the AR gimmick, it’s a very conventional style of play. What I find odd, on reflection, is that this type of game is not called a “Role Playing Game”–and what is involves very little role-playing.

It’s a product of evolution, like all inexplicable things. Pen-and-paper RPGs were supposed to model all aspects of playing a character, though in practice most players focused on stats as a means to an end: that of increasing said stats. People “gamed” role-playing games, rather than role-playing them.

Sure, some people didn’t (and don’t) play them that way, and there are a number of role-playing systems that focus very sharply on driving character interaction rather than combat (somewhat including my own) but when the nascent digital game developers needed a template for long, multicharacter games, they borrowed liberally from the established pen-and-paper RPGs.

The real game loop is: boost numbers so you can unlock more content and boost more numbers. Even incredibly good story-driven RPGs like Lunar: Silver Star Story are fundamentally stat boosters with unspooling scenery. Very little of your time is spent inhabiting the mind and game world of the title character. Most often, the title character’s mindset is as bland as possible, to serve as a passthrough for the gamer. (Successfully un-personifying “you” as the main character was one of the many unsung triumphs of Myst.)

I call Lillie is the Keeper a “Myst-like.” It’s an out-and-out brag posing as a point of reference, even if it’s not 100% true. Myst has been misunderstood for 30 years, because its imitators, from Obsidian to The Witness, have failed to understand the importance of aligned atmosphere, the value of stillness, and the fact that walking around an empty place solving puzzles isn’t any more compelling than doing either activity solo—hence puzzle games and “walking simulators.” In Myst, the “puzzles” are just broken machines of a perfectly recognizable vintage. Within the calm loneliness of the game’s sound, pacing and art, there’s not even a sense that they need to be fixed (at least until the puzzling discovery of the imprisoned brothers). The opening act of the game makes clear that this is a game for a certain type of player: Not a twitch gamer, nor even a problem-solver, but a wanderer. A dreamer.

LitK tries to be this. It tries to be a positive depiction of an individual with a mental health issue. It tries to be an innovative new use for AR. It tries to be an interesting short story. It also tries to be a role-playing game.

Do we need a new term? How about “character-playing game?”

A lot of what I enjoy about games is the escapism: losing myself in another place, another time, another me. I can’t be the only one, can I?

Introducing Lillie is the Keeper

You’ve always wanted a lighthouse. A contained, liminal space at the edge of the world, between sea and sky. A literal beacon in the night. I can put one in your pocket.

Lillie is the Keeper (LitK) is an upcoming Myst-like game played in AR on an iPhone or iPad. You’ll take on the role of Lillie Pine, a 15 year old girl shipwrecked in an empty lighthouse following a mysterious calamity in 1905. With your iOS device, you’ll explore the lighthouse by moving about your real-world space.

The game is structured as a short story, beginning before it begins and ending after it ends, in eight play vignettes or levels. The main character, Lillie, suffers from intrusive thoughts, which we hear as an older, more severe, highly critical version of her own voice.

The game is built in Unity 2021.2 and runs in iOS 14, using AR Foundation 4.2 as a wrapper over AR Kit 5. It is a solo effort by the author, including writing, voice direction, modeling, coding, rigging, sound editing and visual design, and stars actors Sheri Lee (Hearts of New England), Robert Harrison (The Equalizer) and Melissa McCue-McGrath (BewilderBeasts).